User / Role / Permission Management
Platform users have roles and permissions to manage their access levels. Their access is managed as follows:
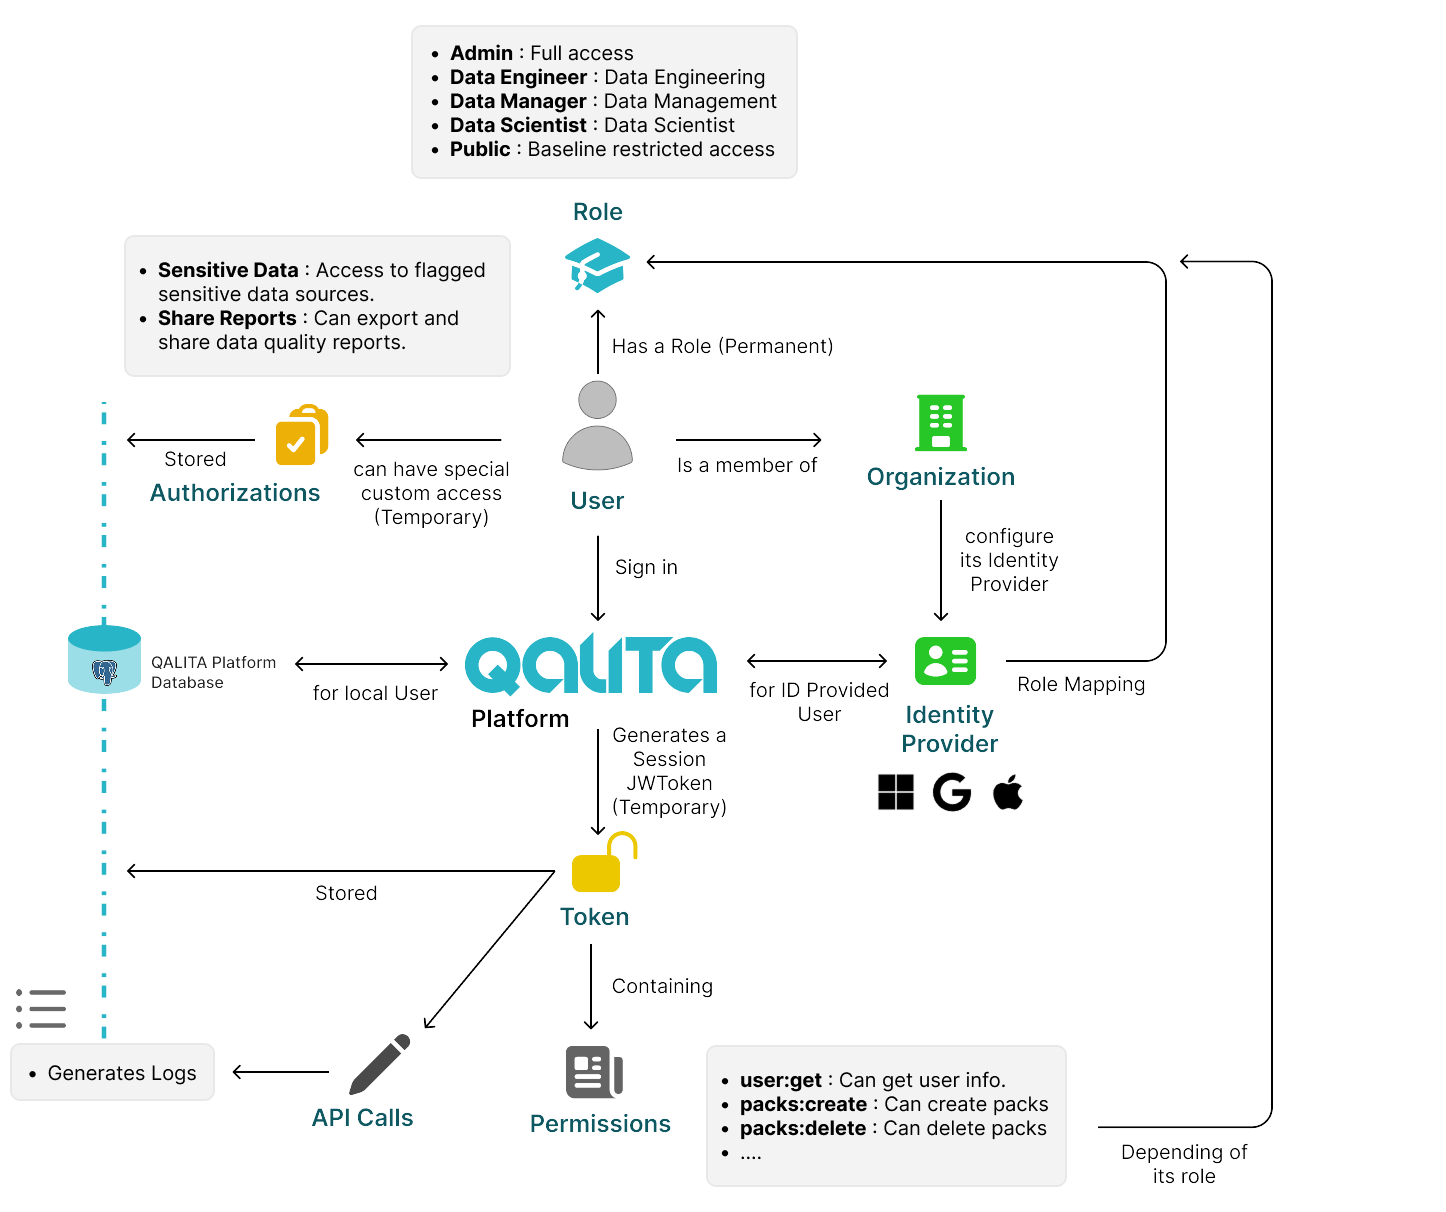
Authentication Mode
Qalita Platform supports the following authentication modes:
- Password Authentication: Users can authenticate with a password and an email. This authentication can be configured to work with a corporate directory using the LDAP protocol.
Configure LDAP
To configure LDAP authentication, you will need to add environment variables to the Backend.
LDAP_SERVER: The LDAP server addressldap://openldap:389LDAP_DN: The base DN for user searchdc=example,dc=orgLDAP_TLS: Enable TLSfalseLDAP_SEARCH_USER: The search usercn=admin,dc=example,dc=orgLDAP_SEARCH_PASSWORD: The search user's passwordadminpasswordLDAP_SEARCH_USER_FILTER: The search filter for users(&(objectClass=person)(uid=%s))LDAP_SEARCH_GROUP_FILTER: The search filter for groups(&(objectClass=posixGroup)(memberUid=%s))LDAP_ROLE_MAPPING: The role mappingadmin:cn=direction,dc=qalita,dc=io;dataengineer:cn=factory,dc=qalita,dc=io;datamanager:cn=conseil,dc=qalita,dc=io
- SAML Authentication: Users can authenticate with an external identity provider (Google, Azure, Okta, etc.).
Configure SAML
To configure SAML authentication, you will need to add environment variables to the Backend.
QALITA_AUTH_MODE: Specify the authentication modesamlQALITA_SAML_AZURE_CLIENT_ID: The application's client ID (see #5-récupérer-les-détails-de-lapplication)QALITA_SAML_AZURE_CLIENT_SECRET: The application's client secret (see #5-récupérer-les-détails-de-lapplication)QALITA_SAML_AZURE_TENANT_ID: The application's tenant ID (see #5-récupérer-les-détails-de-lapplication)QALITA_SAML_AZURE_REDIRECT_URL: The application's redirect URLhttps://api.<qalita-domain>/api/v1/auth/saml/callback
To create an application in Azure Active Directory (Azure AD) and configure SAML authentication for your platform, follow this step-by-step guide. This process integrates with the Single Sign-On (SSO) configuration for your application, using Azure AD as the identity provider.
1. Access the Azure Portal
- Log in to the Azure Portal with your administrator account.
2. Navigate to Azure Active Directory
- In the Azure portal side menu, select "Azure Active Directory" to access your Azure AD directory.
3. Register a New Application
- Go to the "App registrations" section.
- Click "New registration" to start creating a new application.
- Provide a name for your application, select the supported account types, and specify the redirect URI (the callback URL used by your application after SAML authentication). This URI must match the
QALITA_SAML_AZURE_REDIRECT_URLyou will configure later in your environment variables.
4. Verify Authorized APIs
- Once the application is created, access it in the Azure portal.
- In the application menu, find the "API permissions" section.
- Click "Add a permission" > "Microsoft Graph" > "Delegated permissions" > search for
User.Readand add the permission.
5. Create an Application Secret
- Go to the "Certificates & secrets" section of your application.
- Click "New client secret" to create a new application secret. You will need this secret to configure SAML authentication in your platform.
- Use the value to configure the environment variable
QALITA_SAML_AZURE_CLIENT_SECRET.
6. Retrieve Application Details
- After configuring SAML, you will need to retrieve several details to use in your environment variables:
- Client ID (
QALITA_SAML_AZURE_CLIENT_ID): Found in the "Overview" section of the application. - Client Secret (
QALITA_SAML_AZURE_CLIENT_SECRET): You will need to create a secret for the application in the "Certificates & secrets" section. - Tenant ID (
QALITA_SAML_AZURE_TENANT_ID): Visible in the "Overview" section of your Azure Active Directory.
- Client ID (
7. Configure Environment Variables
- On your server or development environment, configure the environment variables you retrieved in the previous step.
8. Test SAML Authentication
- Test SAML authentication to ensure everything is correctly configured and that users can log in to your application via Azure AD.
By following these steps, you will have created an application in Azure AD, configured SAML authentication, and prepared your platform to use Azure AD as the identity provider for SSO authentication.
- Token Authentication: Users can authenticate with an API token (for the backend).
By default, any user is assigned the public role upon their first login, unless a role mapping is specified in the LDAP configuration.
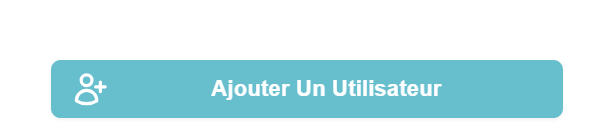
Create a User
To create a user, go to the Users & Roles section in the Settings menu.
Different Roles
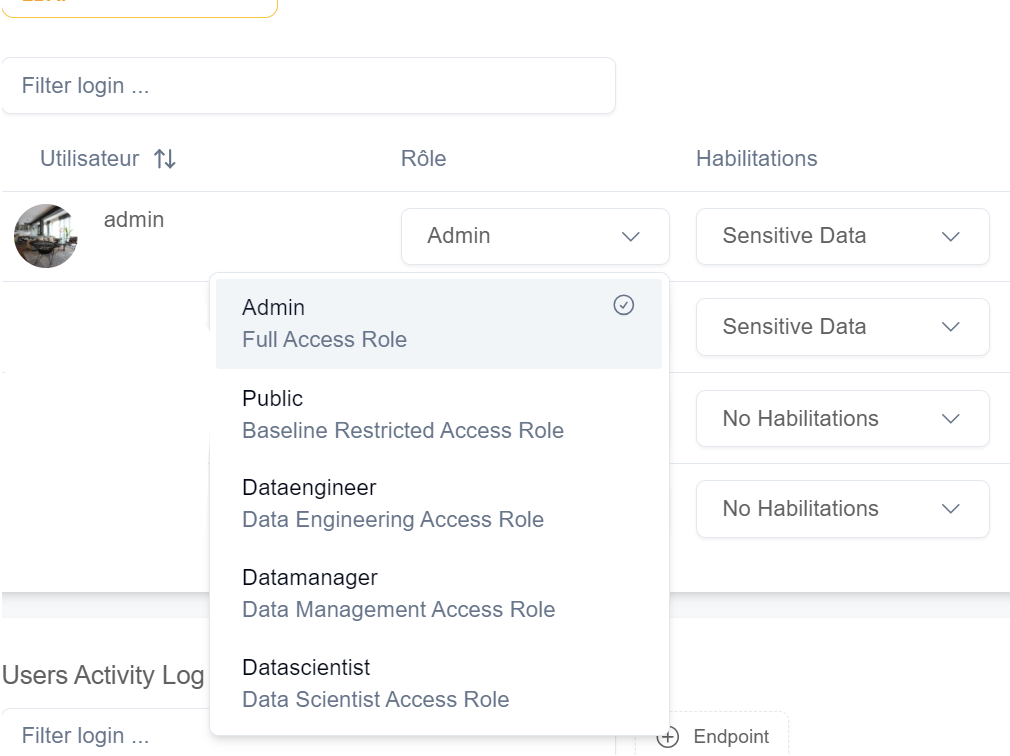
There are different roles in Qalita Platform that allow for distinguishing possible actions and access rights.
| Role | Description | Permissions |
|---|---|---|
| Admin | The administrator role grants access to all platform functionalities. | All |
| Dataengineer | The data engineer role has access to most platform functionalities, except settings and data science. | Agents - Packs - Sources - Projects - Reports - Tickets - Curation Plan - Catalog |
| Datamanager | The data manager role has access to project, report, ticket, and curation plan functionalities. | Sources - Projects - Reports - Tickets - Curation Plan - Catalog |
| Datascientist | The data scientist role has access to catalog, report, and data science functionalities. | Reports only with token - Catalog - Synthetic Data - Model Evaluation |
| Public | The public role has minimal access to platform functionalities. | Profile - Notifications - Reports only with token |
Different Permissions
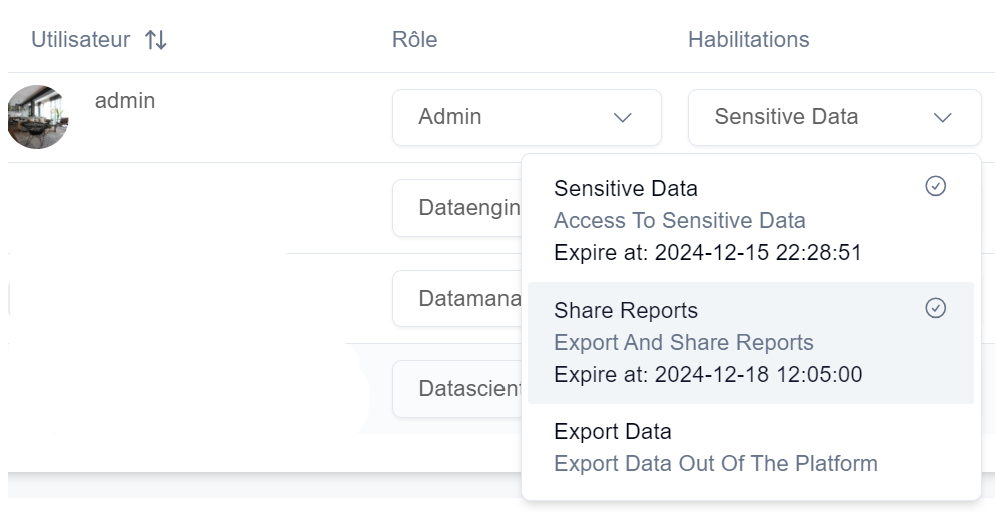
There are different permissions in Qalita Platform that allow granting rights for specific actions.
All permissions have an expiration period (1 year by default).
| Permission | Description | Authorizations |
|---|---|---|
| Sensitive Data | The Sensitive Data permission allows access to sensitive data. | Sensitive Data |
| Share report | The Share report permission allows sharing reports. | Report Sharing |